
In an era of increasing digital connectivity, finding yourself trapped behind a restrictive local network—whether at a university, a corporate office, or a public hub—can feel like a major step backward. Many of these networks employ sophisticated firewalls to block specific services, enforce strict data limits, and require constant re-authentication.
If you have ever seen a “Connection Reset” error while trying to access Steam or found your WhatsApp messages stuck on “Connecting,” this guide is for you. Below, I provide a detailed, step-by-step methodology for building your own Virtual Private Network (VPN) using Amazon Web Services (AWS) and the WireGuard protocol to reclaim your internet freedom.
Table of Contents
1. Understanding the Problem: Why Your Connection is Blocked
Restrictive networks utilize several layers of filtering to control user behavior:
- Authentication Gates: Users are forced to log in via a captive portal before any traffic is allowed.
- Arbitrary Data Caps: Connections are often throttled or cut off after a set limit, such as 500 MB.
- Service-Specific Blocking: Firewalls identify and drop packets associated with gaming platforms like Steam or Epic Games.
- Port Closures: Common ports used by messaging apps (WhatsApp) or VPN protocols (OpenVPN) are intentionally shuttered.
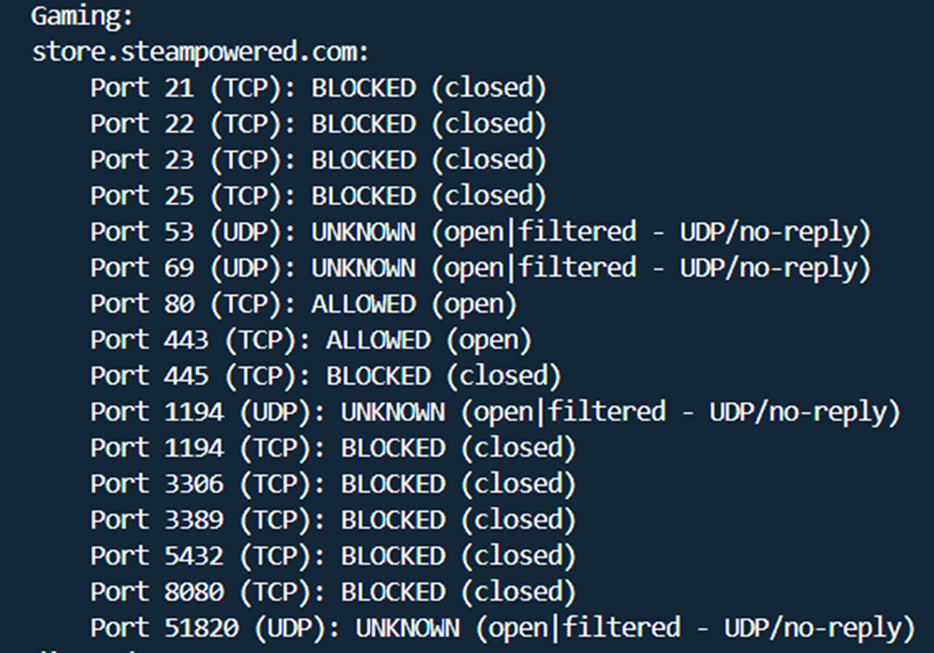
A port scan of these restricted networks typically reveals that while standard web traffic (Ports 80 and 443) is permitted, essential ports for other services are “Blocked” or “Filtered”.
2. The Solution: Why WireGuard on AWS?
To bypass these rules, we utilize a technique called encapsulation. By wrapping all our restricted traffic inside an encrypted WireGuard tunnel, the local firewall sees only a stream of generic UDP packets heading toward an AWS server.
WireGuard was chosen over older protocols like OpenVPN because it is significantly faster, uses state-of-the-art cryptography, and has a smaller code footprint, making it harder to detect and easier to maintain.
Core Infrastructure Components:
- Cloud Host: AWS EC2 Instance (Amazon Linux 2023).
- Protocol: WireGuard (UDP Port 51820).
- IP Management: AWS Elastic IP to ensure a persistent server address.
3. Step-by-Step Implementation Phase 1: Cloud Setup
First, we must establish a server on the “open” internet that will serve as our gateway.
Setting Up the EC2 Instance
- Log in to AWS: Navigate to the EC2 (Elastic Compute Cloud) dashboard.
- Region Selection: Choose a region with the lowest latency to your physical location (e.g., US East or Frankfurt).
- Launch Instance: Name your server “WireguardVPN”.
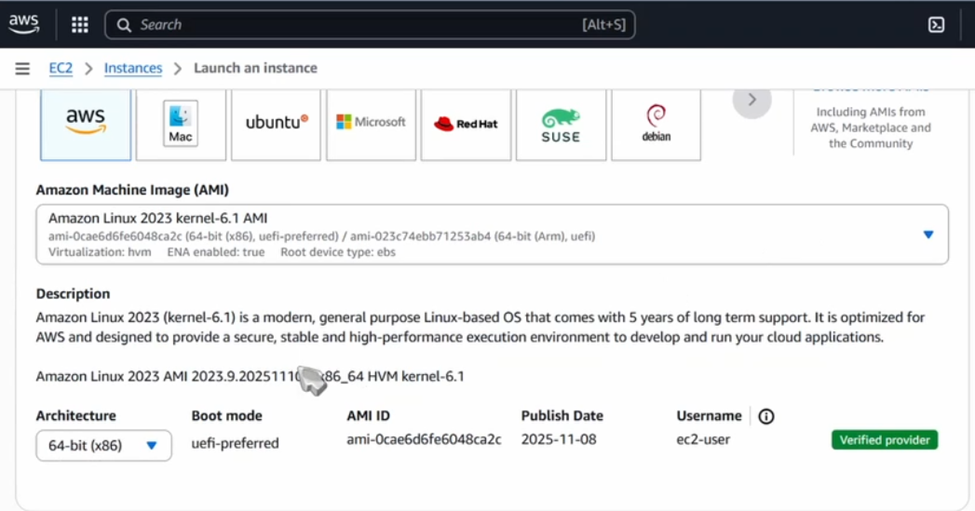
- Select AMI: Choose Amazon Linux 2023 (Free Tier Eligible).
- Instance Type: Select t2.micro, which provides enough CPU and memory for high-speed VPN throughput.
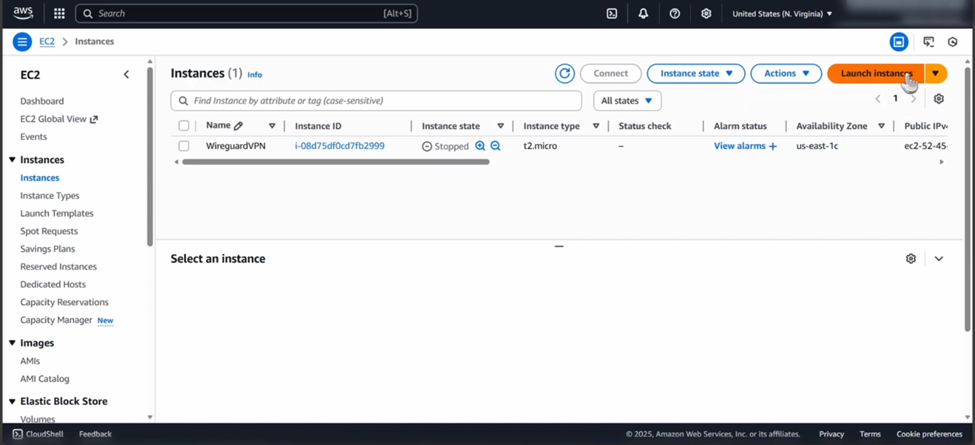
Launch instance
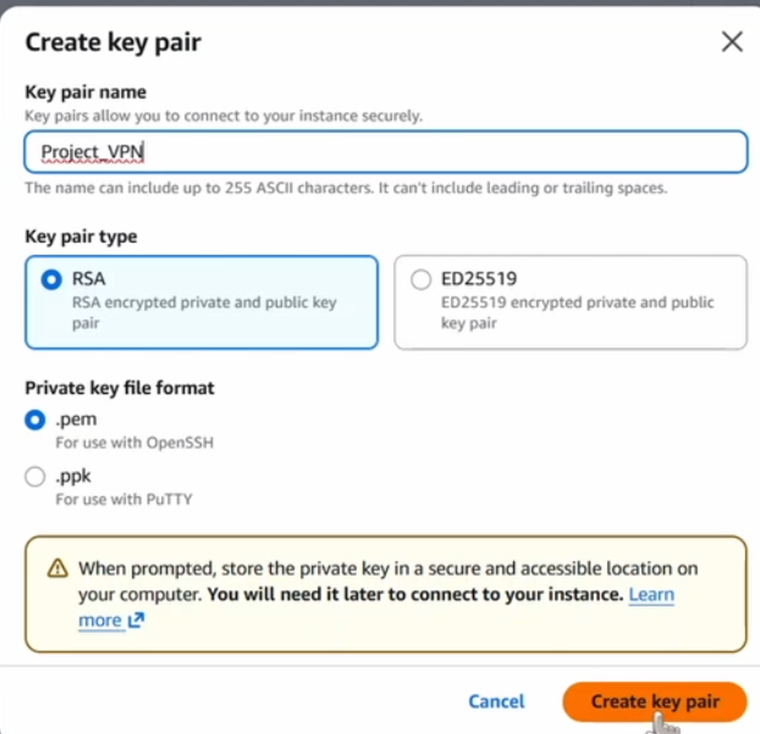
Key Pairs and Security Groups
- Key Pair: Create a new key pair named
Project_VPNand download the.pemfile. You will need this to log in to your server.
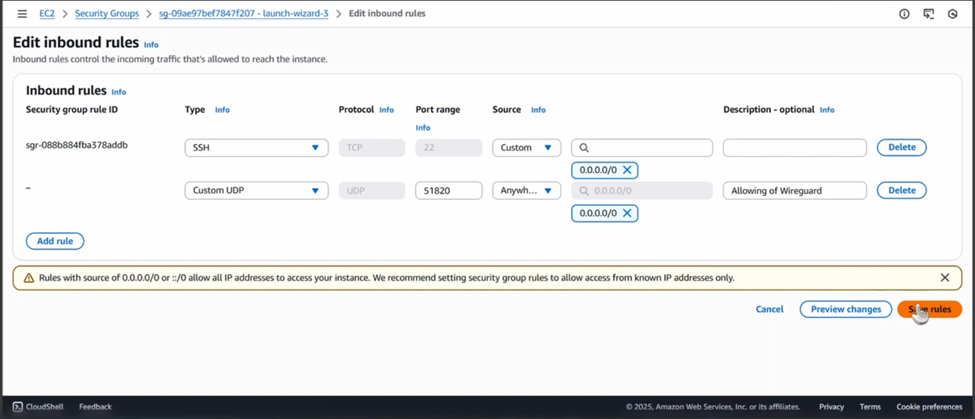
- Firewall Rules (Security Groups): This is the most critical part of the AWS setup. You must add two Inbound Rules:
- SSH (TCP Port 22): To allow you to manage the server.
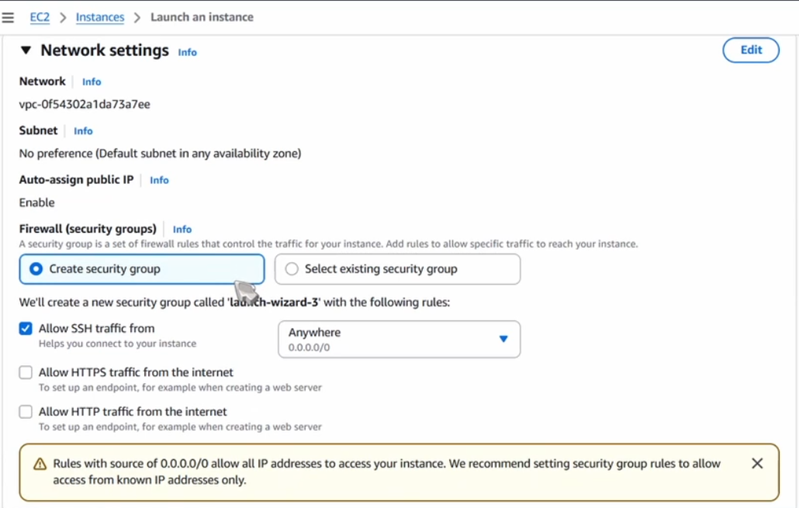
- Custom UDP (Port 51820): This is the specific port WireGuard uses to listen for your connection.
Allocating an Elastic IP
Standard AWS IPs can change if you stop and start your instance. To prevent your VPN from breaking, go to Network & Security > Elastic IPs, allocate a new address, and associate it with your WireguardVPN instance.
4. Step-by-Step Implementation Phase 2: Server Configuration
Now, we must transform our blank Linux server into a functional VPN gateway.
Connecting and Installing
Use your terminal (or PuTTY) to SSH into your server using the key pair you downloaded earlier.
ssh -i "Project_VPN.pem" ec2-user@<Your-Elastic-IP>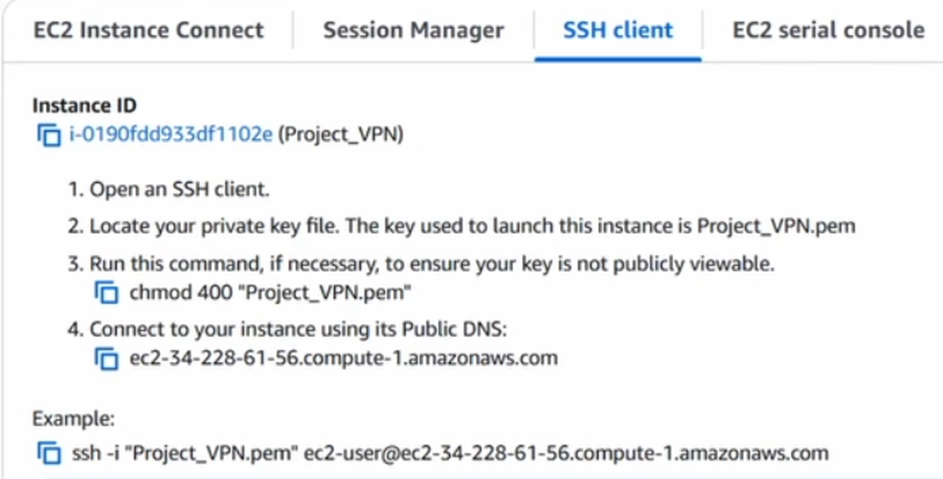
Once logged in, install the necessary tools:
sudo yum install wireguard-tools -y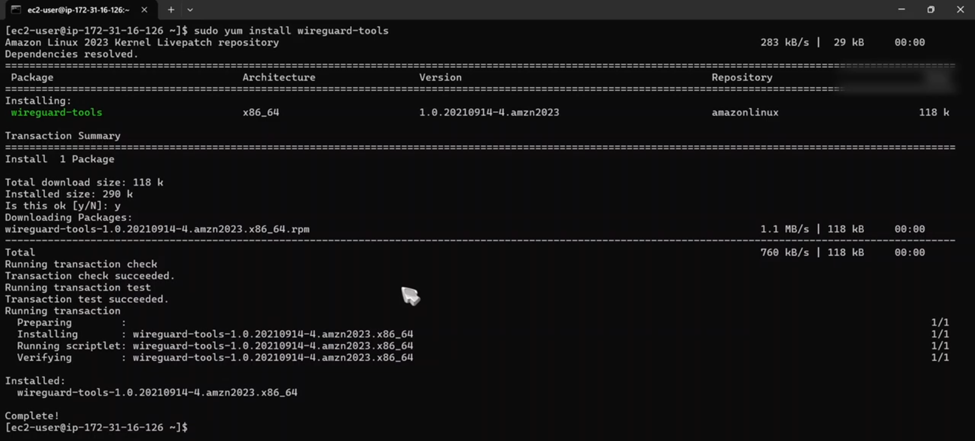
Generate your security keys.
wg genkey | tee private.key | wg pubkey > public.keyConfiguring the WireGuard Interface
Create the configuration file at /etc/wireguard/wg0.conf. This file contains the “instructions” for your VPN.
sudo nano /etc/wireguard/wg0.conf
Inside this file, you will define the internal VPN network (10.0.0.1) and set up IP Masquerading (NAT). NAT is the “magic” step that allows your server to take traffic from your laptop and pass it out to the internet as if the server itself were making the request.
[Interface]
Address = 10.0.0.1/24
ListenPort = 51820
PrivateKey = <PASTE_SERVER_PRIVATE_KEY_HERE>
SaveConfig = true

# IP Masquerading Rules (NAT)
# These rules ensure traffic from the VPN client is routed through the AWS server's internet connection.
PostUp = iptables -A FORWARD -i wg0 -j ACCEPT; iptables -t nat -A POSTROUTING -o enX0 -j MASQUERADE
PostDown = iptables -D FORWARD -i wg0 -j ACCEPT; iptables -t nat -D POSTROUTING -o enX0 -j MASQUERADE
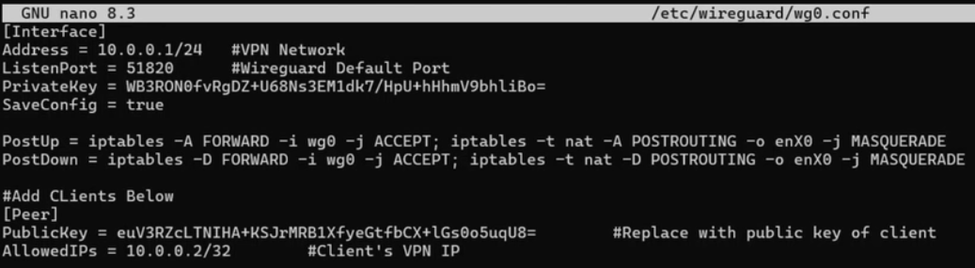
Important: Replace enX0 with your actual network interface name (check using ip link, usually eth0 or ens5)
Enabling IP Forwarding
By default, Linux drops packets that aren’t intended for the server itself. We must turn the server into a Router:
sudo sysctl -w net.ipv4.ip_forward=1To make this permanent, echo the setting into /etc/sysctl.conf.
echo "net.ipv4.ip_forward=1" | sudo tee -a /etc/sysctl.conf
sudo sysctl -p
Starting the Service
Enable the service so it starts automatically if AWS reboots the server, then start it immediately:
sudo systemctl enable wg-quick@wg0
sudo systemctl start wg-quick@wg0

Verify status
sudo wg show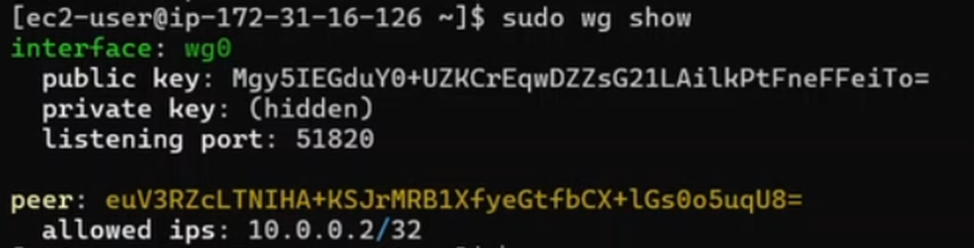
5. Step-by-Step Implementation Phase 3: Client Configuration
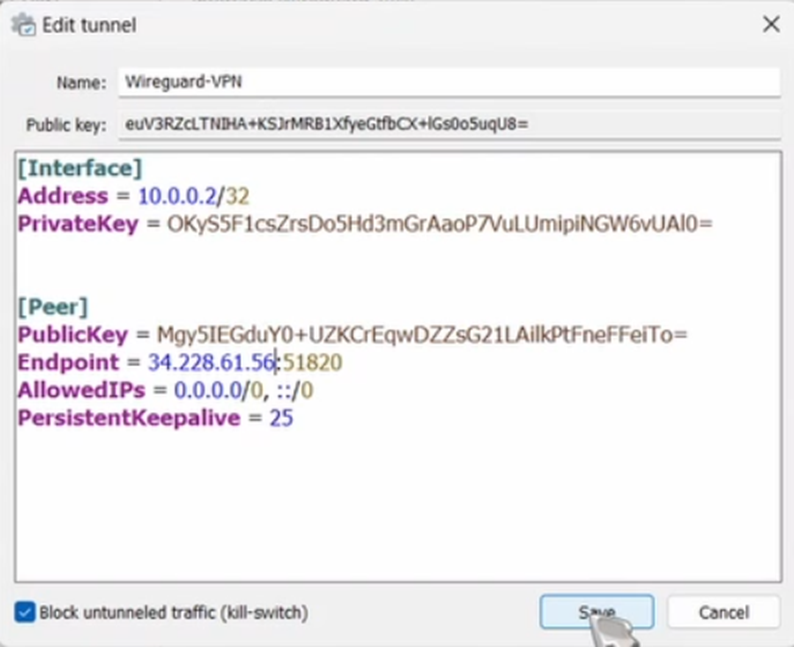
On your personal device (e.g., Windows), install the official WireGuard client.
- Click Add empty tunnel.
- The client will auto-generate a public/private key pair.
- Set your internal IP to
10.0.0.2/32. - Set AllowedIPs to
0.0.0.0/0. This is vital—it tells your computer to send all internet traffic through the VPN, not just some of it.
Finally, back on your AWS server, add your client’s public key to the [Peer] section of the server config and restart the interface.
Open the config file again:
sudo nano /etc/wireguard/wg0.confAdd the client (Peer) details at the bottom:
[Peer]
PublicKey = <PASTE_CLIENT_PUBLIC_KEY_HERE>
AllowedIPs = 10.0.0.2/32
Restart the interface to apply changes:
sudo systemctl restart wg-quick@wg0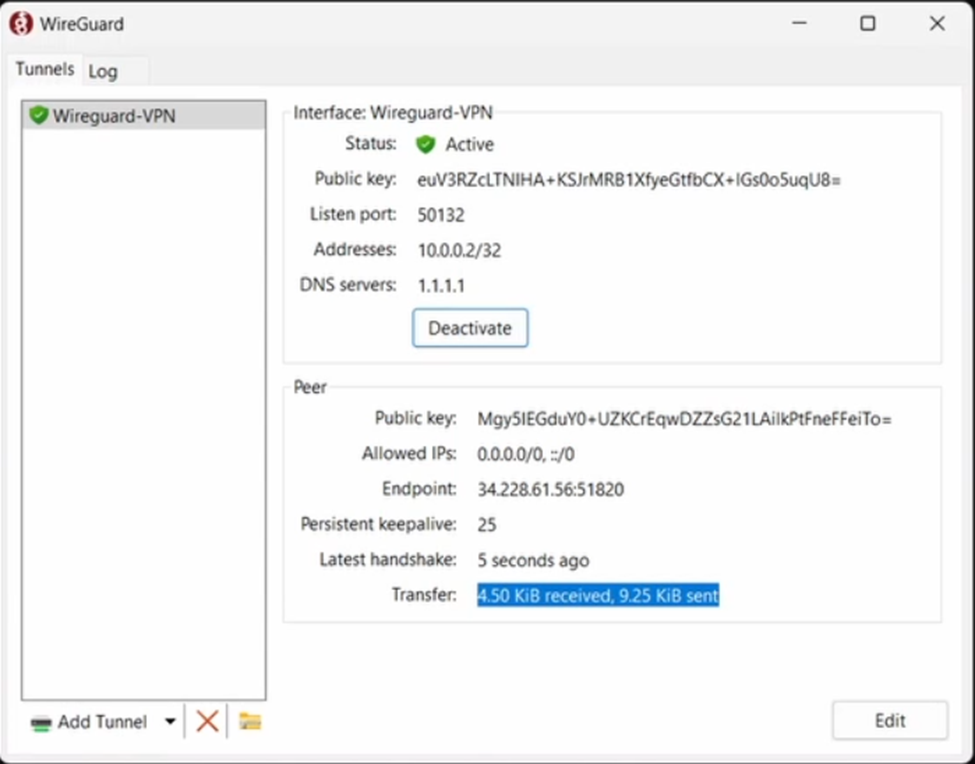
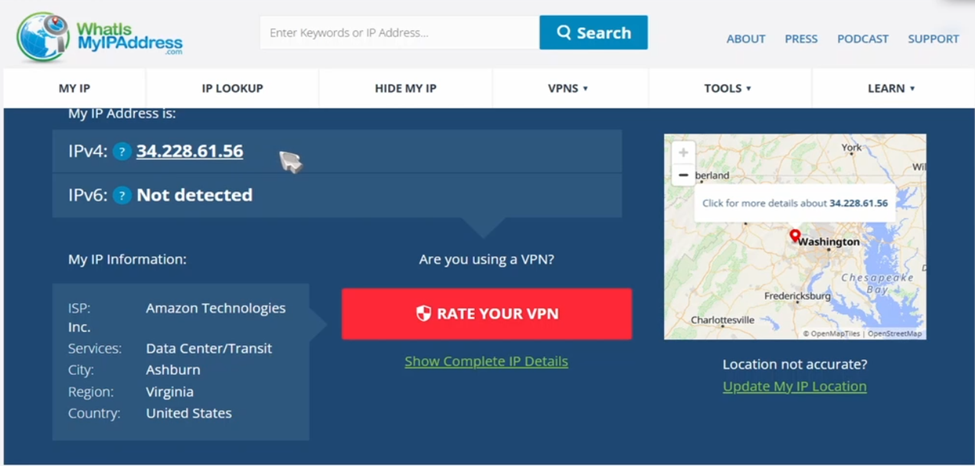
6. Verification: Measuring Success
Once the tunnel is active, you can verify the results immediately.
IP Address and Location
Before the VPN, your IP address belongs to the local ISP. After activating the VPN, your IP should change to your AWS Elastic IP, and your location will show as the AWS data center (e.g., Virginia or Frankfurt).
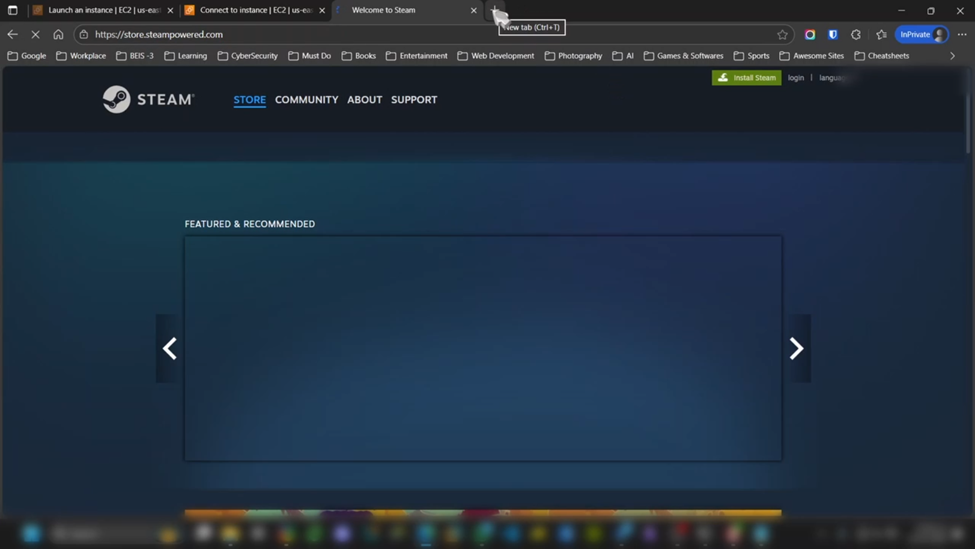
Service Restoration
Test the restricted services. Steam store pages should now load without errors, and WhatsApp should connect instantly.
7. Conclusion: Digital Sovereignty
By deploying a personal VPN server, you effectively bypass content filtering and port blocking enforced at the local firewall level. This methodology provides a lightweight, secure, and persistent solution for anyone needing to regain access to a restricted internet.
Would you like me to generate a troubleshooting checklist to add as an appendix for users who might encounter common AWS connection errors?