We are taught to trust two things online: the lock icon and the URL bar. If the domain is correct and the connection is secure, we assume we are safe.
But what happens when the browser window itself is a lie?
Today, we are breaking down a phishing technique so effective it bypasses even the trained eye: the Browser-in-the-Browser (BitB) attack. By faking a browser popup using HTML and CSS, attackers can trick you into entering login credentials or even scanning a WhatsApp QR code on what looks like a legitimate site.
In this lab, I’ll show you exactly how it works by setting up a safe demonstration on AWS, so you can learn how to spot it before it targets you.
Table of Contents
What is the BitB Attack?
BitB is a phishing attack where hackers use HTML, CSS, and JavaScript to create a fake browser window right inside a webpage. It looks like a legit site for logging in with Google, Microsoft, or even scanning a WhatsApp QR code. The fake window shows a real-looking URL with a green lock icon, tricking you into entering credentials or OTPs.
Unlike old-school phishing with obvious fake sites, this one loads the real login page in a controlled environment, making it hard to detect. It was first popularized in 2022 and has evolved to target apps like WhatsApp for OTP interception.
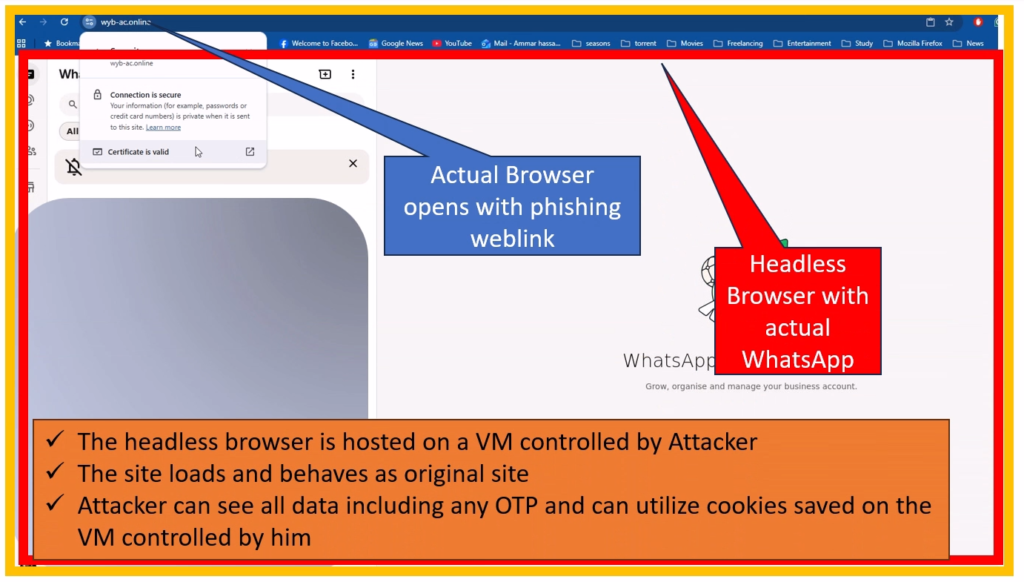
Here’s the breakdown: A victim clicks a phishing link, say from an email promising a WhatsApp update. The page loads a fake website that mimics a browser window. Inside, it either draws a spoofed login form or embeds the real WhatsApp Web page. When you enter your details or scan the QR (which sends an OTP), the attacker intercepts it in real-time. They can use tools to log keystrokes or hijack the session. This bypasses 2FA because you’re authenticating on the real site, but in their controlled browser.
So in short, a headless browser with the target site is hosted on a VM controlled by the attacker. Once a victim clicks on the phishing link, he is redirected to the hosted browser instance where the Attacker can see all data including any OTP and can utilize cookies saved on the VM controlled by him.
Lab Prerequisites
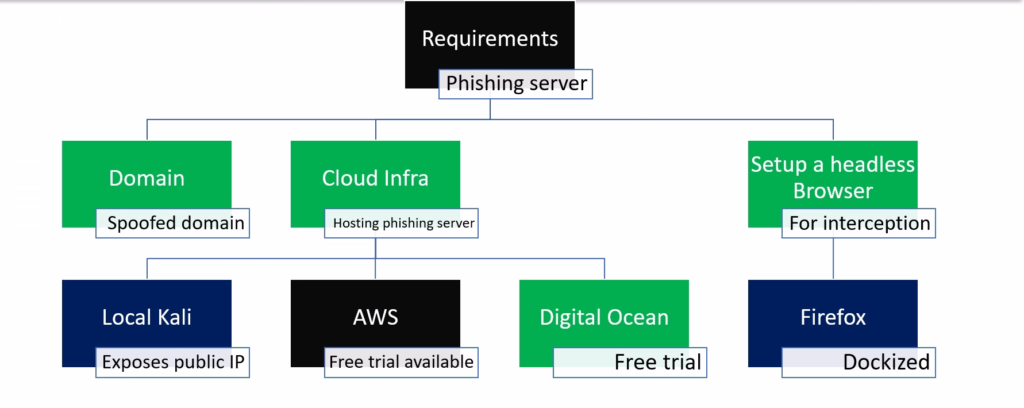
For this practical lab, we need three key components:
- A Domain Name: You need a domain name to serve as the phishing link. You can buy this directly from Cloudflare or use a registrar like Namecheap, but it is critical that your DNS is managed by Cloudflare.
- A Cloud Virtual Machine: Second, you need a Cloud Virtual Machine. Many providers offer free trials, but for this video, I will be using AWS.
- A Headless Browser: And finally, we need a headless browser installed on that VM—we will be using Firefox for this setup.
Step 1: Setting up the Cloud VM (AWS)
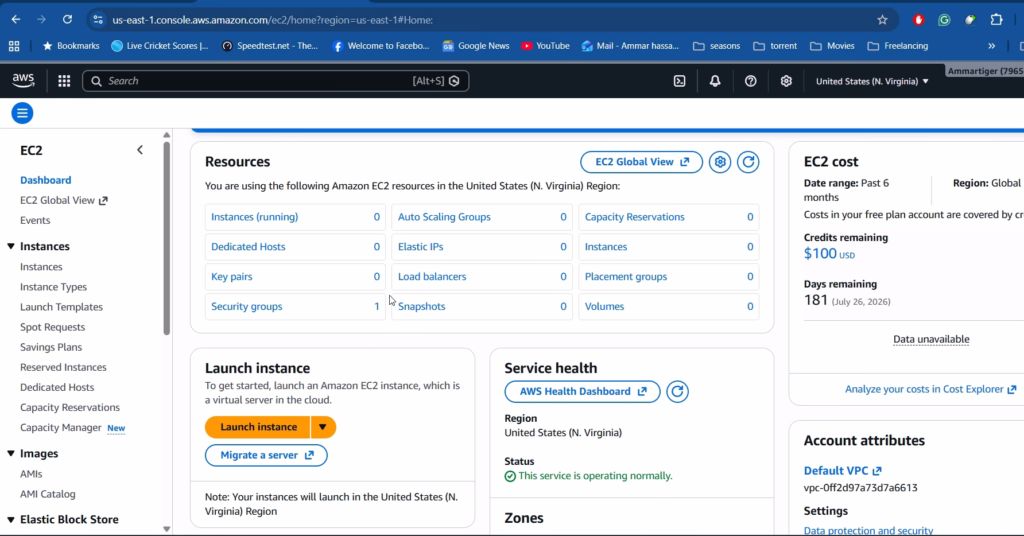
For this demo, I’ll use an AWS VM to keep our environment isolated and safe. AWS offers a free trial that is perfect for getting started, so sign up for an account and head to the Console Home. From there, navigate to the EC2 Dashboard and click Launch Instance.
Give your instance a name and select a basic Linux AMI, like Ubuntu. For this lab, we need reliable performance to avoid any lag with the headless browser, so I am selecting the m7i-flex.large instance type, which provides sufficient RAM and CPU.
Under Network Settings, make sure to allow traffic for SSH, HTTP, and HTTPS, then go ahead and Launch the instance. In a few moments, the instance will be live, and you will see all the details, including your Public IP address.
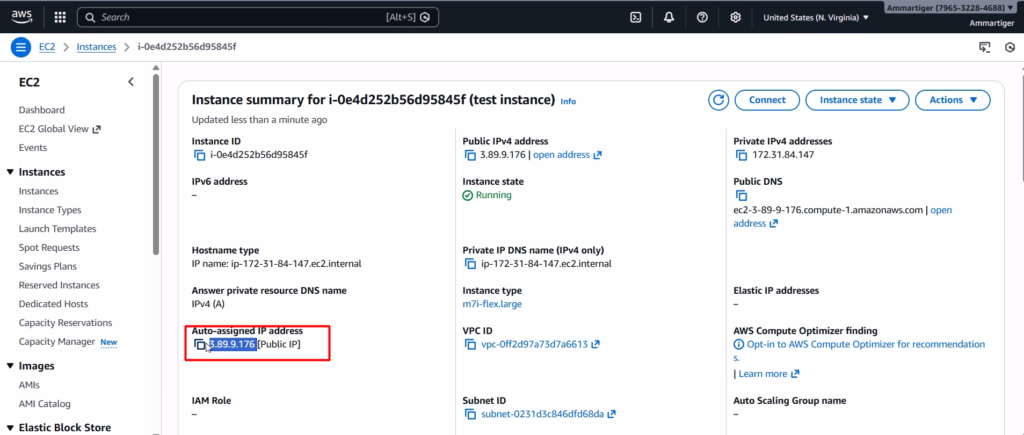
Click Connect, select the EC2 Instance Connect tab, and hit connect again. This establishes an SSH connection directly inside your browser. Once we are in, we can verify our IP and current user. You will also notice that Docker is not installed yet—which is exactly what we will set up in the next step.
Step 2: Installing Docker
To install Docker, we will follow the official Docker documentation. According to the guide, our first step is to remove any conflicting packages. So, go ahead and run the command provided in the documentation to clear those out.
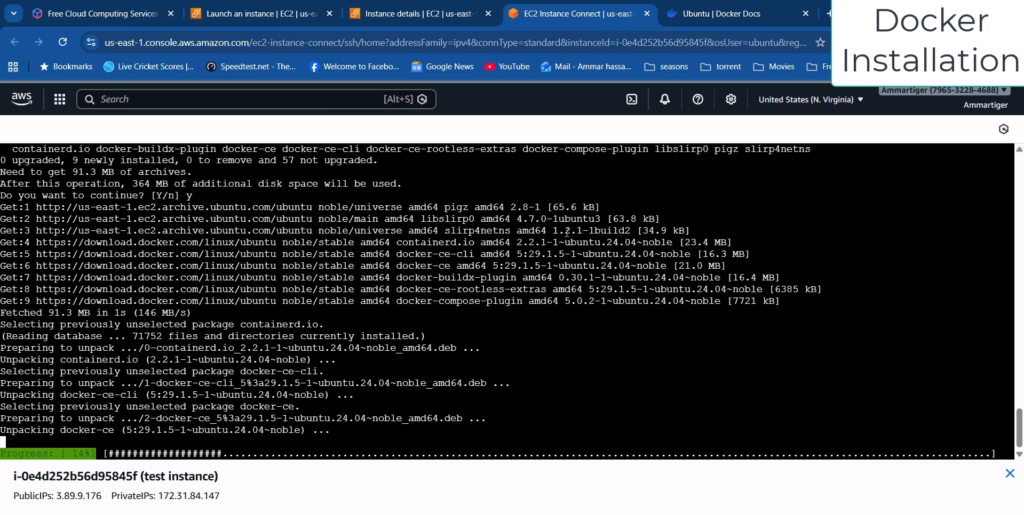
Next, simply follow the remaining steps in the guide and execute the commands one by one to complete the installation.
Step 3: Deploying the Headless Browser
Next, we need to deploy our headless Firefox browser. Search for the Firefox Docker image and open the GitHub repository. You will find the standard command there to pull the image and set everything up.
For this lab, I have modified that command slightly: I added a read/write volume so our session data persists, and I mapped the service to port 80 for easy access. Run the command, and it will automatically fetch and initialize the container.
docker run -d \
    --name=firefox \
    -p 80:5800 \
    -v  ~/firefox_data:/config:rw \
--shm-size 2g \
    jlesage/firefox
Now, simply enter the VM’s IP address into your address bar. As you can see, we are now successfully running a remote Firefox instance directly inside Chrome.
Step 4: Configuring the Logger
Next, we will be installing a keylogger so that whatever the victim does is logged. Click on the Extensions icon (puzzle piece) in the toolbar and select “Find more add-ons” to discover extensions.
Search for “keyloggers”. We will get many results. We will use Nifty Keylogger for our purpose. Select it and add it to Firefox.
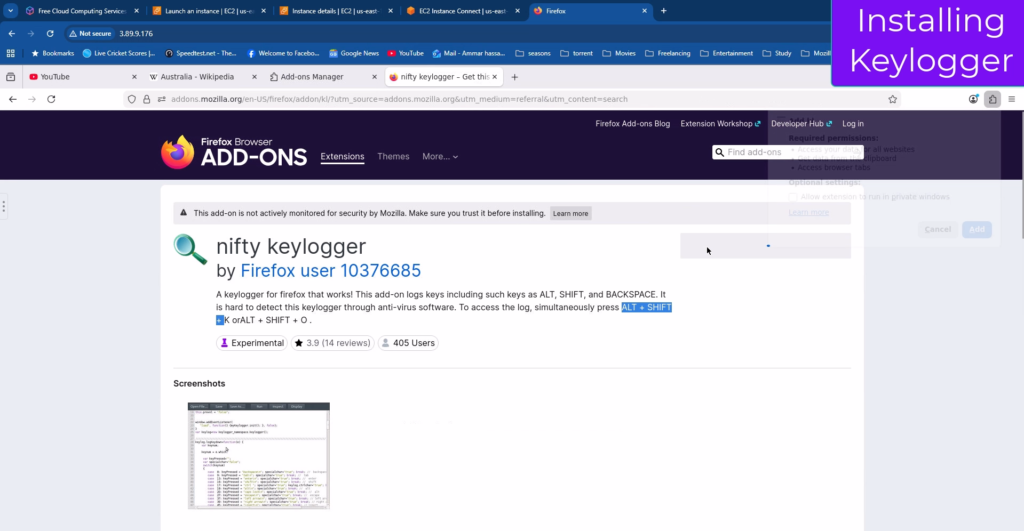
Once installed, click on the extension icon and open its settings to manage the extension. Here, allow everything to enable it on all sites and in private windows. Now, close all the tabs.
Step 5: Creating the Illusion (Kiosk Mode)
To make this convincing, we need to strip away the browser UI. We have to remove the side pane and the address bar so the victim cannot tell they are looking at a separate remote browser instance.
Head back to your SSH session. First, stop the running container, and then remove it completely to clear the previous configuration.
sudo docker stop firefox
sudo docker rm firefox
Now, run the container again using the updated command shown on screen. This time, we are enabling Kiosk Mode, which forces the browser into a permanent full-screen state.
sudo docker run -d \
  --name=firefox-kiosk \
  -p 80:5800 \
  -e FF_OPEN_URL="https://web.whatsapp.com/" \
  -e FF_KIOSK=1 \
  -v ~/firefox_data:/config:rw \
  --shm-size 2g \
  jlesage/firefox
If you browse back to the IP address now, you will see the difference immediately: the address bar is gone, and we have a clean window.
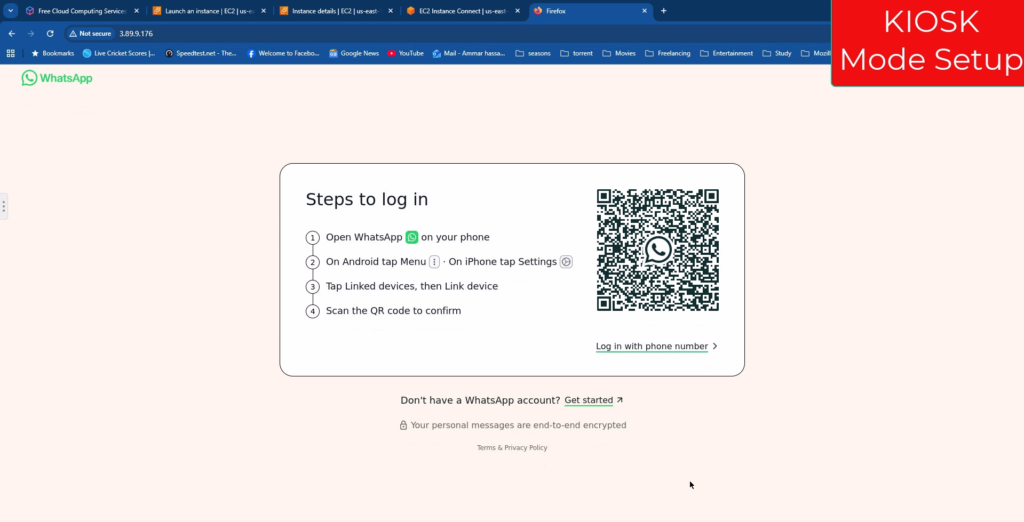
Finally, to remove that floating side bar, execute the configuration command shown here.
sudo docker exec firefox-kiosk sed -i 's/<\/head>/<style>#noVNC_control_bar, #noVNC_control_bar_handle, .noVNC_panel { display: none !important; }<\/style><\/head>/' /opt/noVNC/index.htmlRefresh the page, and there it is: a perfect, distraction-free WhatsApp interface.
The trap is set. If a victim scans this QR code, it will load their real WhatsApp chats just like normal—except now, every message they see is also visible to us on the attacker’s side.
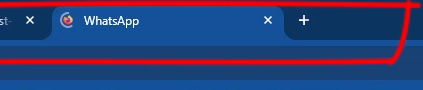
Step 6: Fixing the Page Title
Finally, we need to fix the page title. Right now, the tab might show a generic name, which is a dead giveaway. To make it realistic, run the command shown to inject the correct title: ‘WhatsApp’.
sudo docker exec firefox-kiosk sed -i 's/<title>.*<\/title>/<title>WhatsApp<\/title>/' /opt/noVNC/index.htmlNow, if you check the window, the title bar matches exactly what a user expects to see. The illusion is complete.
Step 7: DNS and SSL Configuration
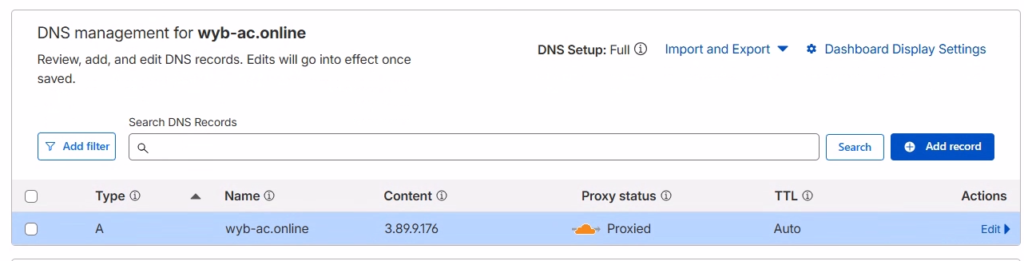
Now, we need to point our phishing domain to the attack server. I already have a domain managed on Cloudflare for this purpose.
Open the DNS Settings for your domain. First, remove any existing records to avoid conflicts. Then, add a new ‘A’ Record. Set the Name to @ (or your subdomain) and the IPv4 Address to the public IP of our AWS instance.
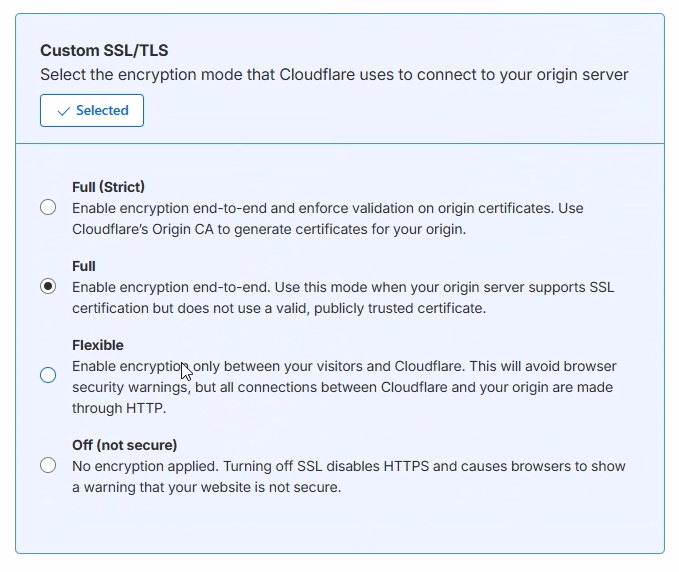
Next, we need to secure the site with HTTPS to make it look legitimate. Navigate to the SSL/TLS settings in the sidebar. Change the encryption mode to Flexible. This allows Cloudflare to handle the SSL certificate between the victim and their edge network, while talking to our server over HTTP.
With that, everything is set up. Open a new tab and visit your domain. As you can see, the page loads perfectly, and crucially, it has a valid SSL padlock.
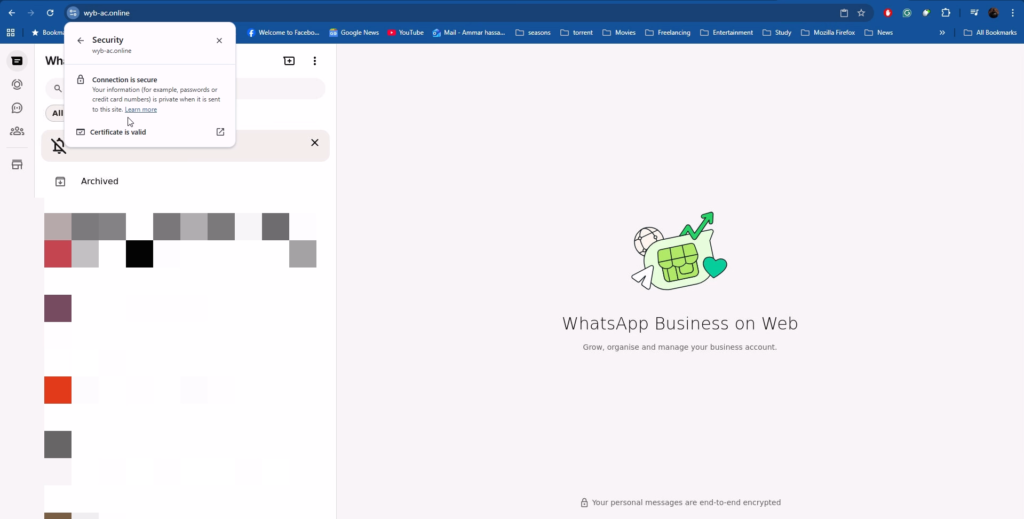
An attacker can now send this link to a target. Because the application behaves exactly like the original—including real-time interactions—the victim is unlikely to notice it’s a fake, allowing us to bypass even Multi-Factor Authentication mechanisms. And there you have it: a fully functional Browser-in-the-Browser attack lab.
Conclusion
The BitB attack proves that we can no longer trust our eyes alone.
By mimicking the browser window itself, attackers can bypass OTPs and steal sessions in real-time.
Now that you know how the magic trick works, you know exactly what to look for: if the window can’t be dragged, it’s a fake.
Thanks for reading, and stay safe.
FAQ
What exactly is a Browser-in-the-Browser (BitB) attack?
BitB is a modern phishing technique where attackers use HTML, CSS, and JavaScript to draw a fake browser window inside a legitimate-looking webpage. It mimics standard login popups (like Google, Microsoft, or WhatsApp) and displays a fake URL bar with a green lock icon to trick users into believing they are on a secure site.
How does this attack bypass Multi-Factor Authentication (MFA/OTP)?
Unlike traditional phishing sites that just copy a login form, BitB loads the real login page inside a “headless” browser controlled by the attacker. When the victim scans a QR code or enters an OTP, they are actually authenticating the attacker’s session in real-time. The attacker intercepts the session cookies and tokens immediately, bypassing 2FA.
What is a “Headless Browser” and why is it used?
A headless browser is a web browser without a graphical user interface, hosted on a server (like a Cloud VM). In this attack, the victim is redirected to this hosted browser instance. To the victim, it looks like a popup on their screen, but they are actually remotely controlling the browser on the attacker’s machine.
Why is “Kiosk Mode” important for this setup?
We configure the headless browser to run in Kiosk Mode to strip away the user interface elements. This forces the browser into a permanent full-screen state, removing the real address bar and side bars so the victim cannot distinguish the remote browser from a legitimate popup window.