
Table of Contents
Looking for truly free WordPress hosting that isn’t slow, ad-filled, or unreliable?
The Google Cloud “Always Free” tier offers a powerful, professional-grade solution. Unlike shared hosting, you get your own virtual machine, giving you better performance and security.
This guide will show you exactly how to host a WordPress site on Google Cloud—completely free, forever.
We’ll walk you through the entire process, from launching your server with a Bitnami WordPress image to setting up a free, auto-renewing Let’s Encrypt SSL certificate (for that secure https:// padlock). No hidden fees, just a high-performance site.
What You’ll Need to Get Started
- A Domain Name: You can use a main domain (e.g.,
yourdomain.com) or a subdomain (e.g.,blog.yourdomain.com). This guide will use a subdomain, but the process is the same. - A Google Cloud Account: If you’re new, you can sign up easily. Google often provides free trial credits, but we are focused on the Always Free Tier, which doesn’t expire.
What is the Google Cloud “Always Free” Tier?
This isn’t just a temporary trial. The “Always Free” tier gives you a specific set of resources every month, for free, forever. For our WordPress site, these are the key limits:
- 1
e2-microVM Instance: Your (non-preemptible) server, running 24/7 in a specific US region. - 30 GB-months Standard Persistent Disk: Your website’s hard drive storage.
- 1 GB Network Egress: Outbound data transfer from North America to other regions.
In short, you get a small server with 30GB of storage, all for free. You’d only pay if your site becomes massively popular and serves a lot of data to visitors from outside North America (like China or Australia).
Step 1: Deploy Your Google Cloud WordPress Instance (with Bitnami)
First, we’ll launch our server from the Google Cloud Marketplace.
- Log in to your Google Cloud Console.
- In the top search bar, type “WordPress Bitnami” and select the “WordPress with NGINX and SSL Certified by Bitnami…” result. Bitnami pre-packages WordPress, which saves us a ton of setup time.
- Click “Launch” on the overview page.
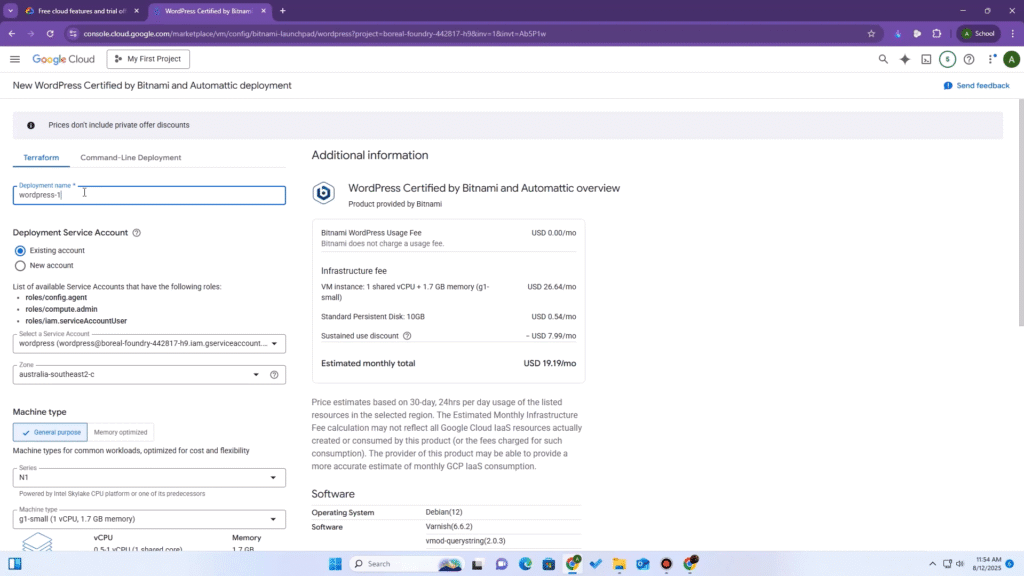
- This brings you to the Deployment Configuration page. This is the most important step to ensure your site is free.
- Deployment name: You can leave this as the default.Zone: This is critical. To stay in the free tier, you must select a zone from one of the free US regions. I recommend choosing one in
us-east1(e.g.,us-east1-b).Machine type: By default, this ise2-small(which is NOT FREE). Click the dropdown and selecte2-micro. This is the core of the “Always Free” offer.Boot disk: Change the Boot disk type to “Standard Persistent Disk” and set the size to 25 GB. This is safely within the 30 GB free limit.Firewall: Leave the defaults. The “Allow HTTP” and “Allow HTTPS” boxes should already be checked.
- Deployment name: You can leave this as the default.Zone: This is critical. To stay in the free tier, you must select a zone from one of the free US regions. I recommend choosing one in
- Once configured, click “Deploy”. This process will take a few minutes as Google Cloud builds your server.
Step 2: Find Your WordPress Login Credentials & IP Address
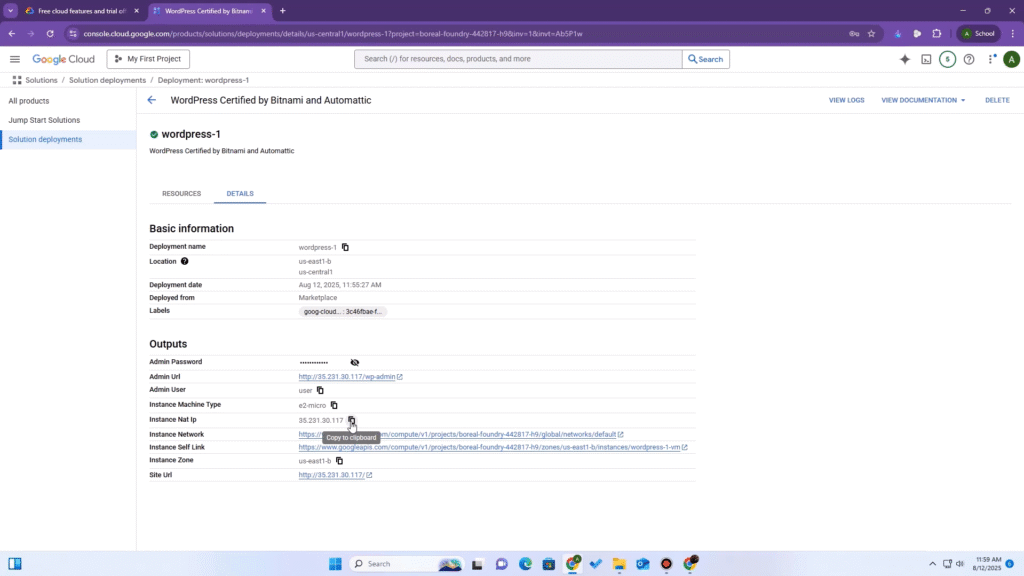
Once the deployment is finished, you’ll see a summary page.
- On the right side, find the box with your site details. You will see:
- Site address (External IP): This is your server’s public IP address.WordPress Admin user: (Usually
user)WordPress Admin password: (A randomly generated password)
- Site address (External IP): This is your server’s public IP address.WordPress Admin user: (Usually
- Copy the External IP address; we’ll need it in the next step.
- You can click the “WordPress Admin URL” and log in with the credentials to confirm your site is live. You’ll see a basic WordPress site.
Step 3: Point Your Domain to the Google Cloud IP (Add DNS ‘A’ Records)
Now, we need to tell your domain to point to your new server’s IP address. I’m using Cloudflare, but these steps are nearly identical for any DNS provider (GoDaddy, Namecheap, etc.).
- Log in to your DNS manager and navigate to the DNS records for your domain.
- We need to create two ‘A’ records.
- First Record (Root/Subdomain):
- Type:
A - Name:
mavra.ammarhassan.me(If you’re using a main domain, you would just put@). - IPv4 address: Paste the External IP you copied from Google Cloud.
- Type:
- Second Record (for ‘www’):
- Type:
A - Name:
www.mavra.ammarhassan.me(or justwwwif you used@before). - IPv4 address: Paste the exact same External IP address.
- Type:
A Critical Note for Cloudflare Users
If you are using Cloudflare, the Proxy status (the cloud icon) must be set to “DNS Only” (a grey cloud) for both records for now. The SSL tool we’re about to use will fail if it’s “Proxied” (orange cloud). We can turn the proxy on after setup is complete.
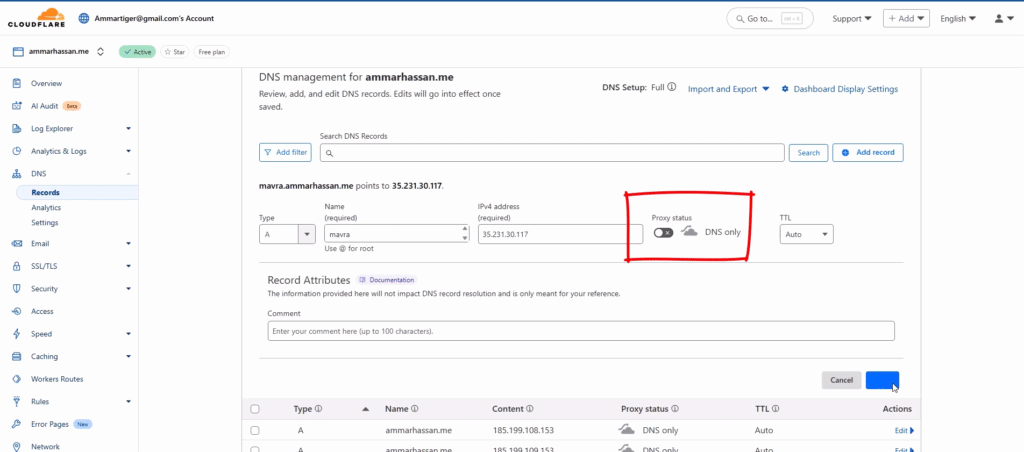
- Save your records. DNS changes can take a few minutes (or longer) to propagate, but Cloudflare is usually instant.
Step 4: Install a Free SSL Certificate (Let’s Encrypt) via SSH
Our final step is to secure our site with https://. The Bitnami image includes a fantastic tool that makes this incredibly easy.
1. Connect to Your Instance with SSH
- Go back to your Google Cloud Console.
- In the navigation menu, go to Compute Engine > VM instances.
- Find your instance and, on the far right, click the “SSH” button.
- This opens a secure terminal directly in your browser.

2. Run the Bitnami HTTPS Configuration Tool
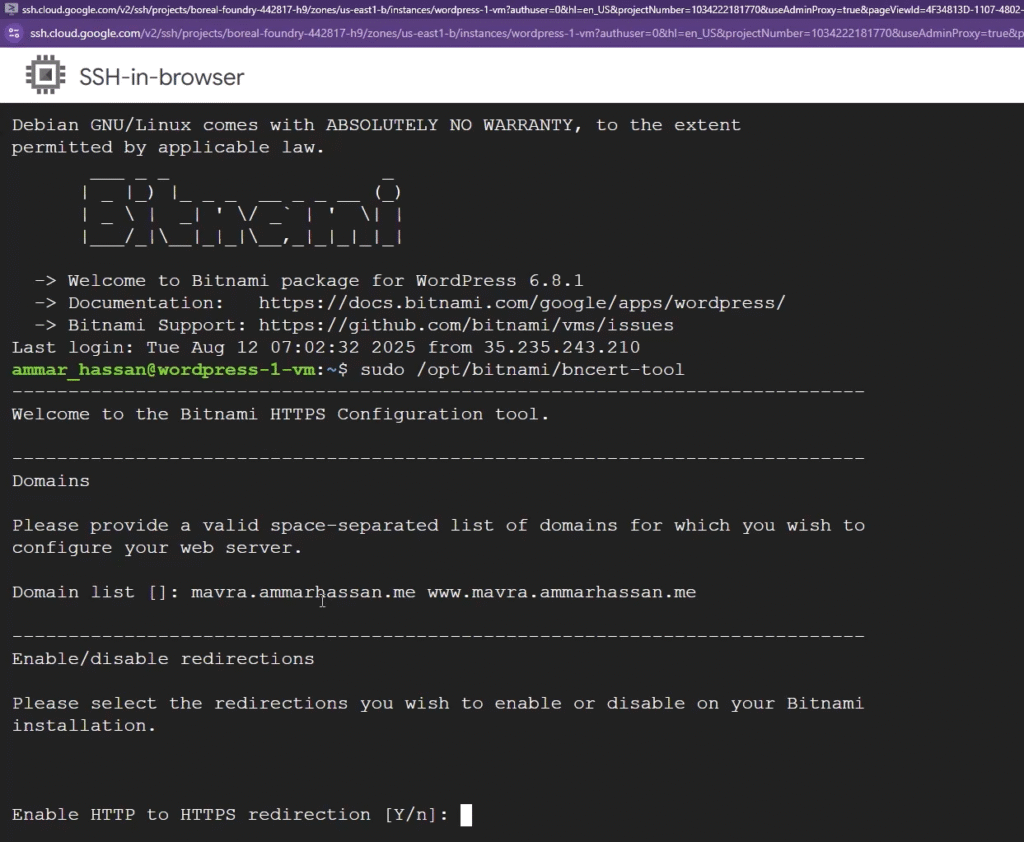
- Once the terminal connects, type (or paste) the following command and press Enter:Bash
sudo /opt/bitnami/bncert-tool - This launches the Bitnami HTTPS Configuration Tool. Just follow the prompts:
- Domain list: Type your domains, separated by a space (e.g.,
mavra.ammarhassan.me www.mavra.ammarhassan.me). Hit Enter.Enable HTTP to HTTPS redirection? TypeYand Enter. (This is great for SEO).Enable non-www to www redirection? (or vice-versa): This is your choice. I’ll typeY.Do you agree to the Let’s Encrypt Subscriber Agreement? TypeYand Enter.Enter your email address: (This is for renewal notices).
- Domain list: Type your domains, separated by a space (e.g.,
- That’s it! The tool will now automatically request the certificate, install it, configure your server, and set up a cron job to auto-renew it for you.
- Press Enter to continue when it’s done, then you can close the SSH window.
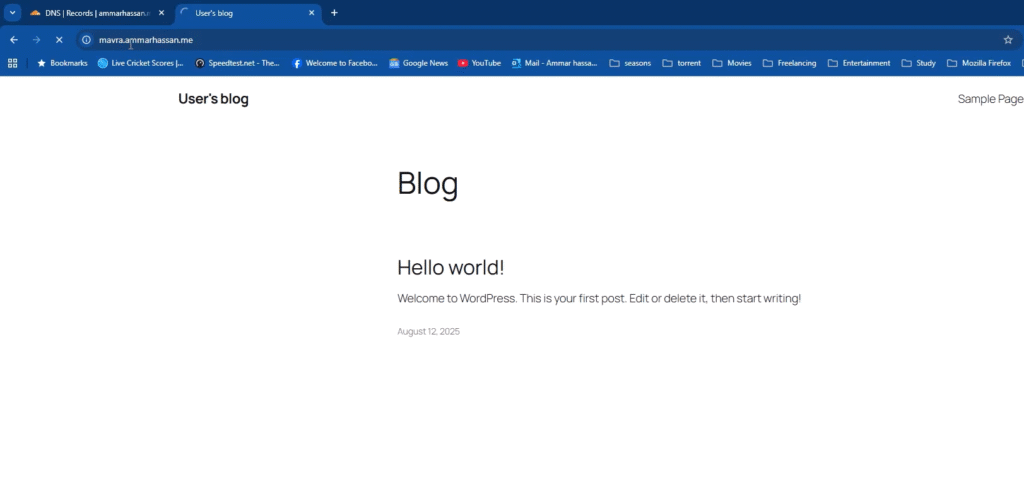
Step 5: Verify Your Secure (HTTPS) WordPress Site
It’s the moment of truth.
- Open a new browser tab.
- Type in your domain using
https(e.g.,https://mavra.ammarhassan.me).
You should see your WordPress site load, and most importantly, you’ll see the secure padlock in the address bar.
Conclusion: Your Free Google Cloud WordPress Site is Live!
Congratulations! You have successfully learned how to host a WordPress site on Google Cloud’s Always Free tier. You now have a secure, high-performance free WordPress hosting setup that you fully control.
You can log in to your admin panel (e.g., https://your-domain.com/wp-admin) with the password from Step 2 and start building your site.
Thanks for reading! I hope this guide was helpful.
Frequently Asked Questions (FAQ)
Is Google Cloud WordPress hosting really free forever?
Yes, as long as you stay within the “Always Free” tier limits (one e2-micro instance, 30 GB standard disk, 1 GB network egress). For a small blog or personal site, this is more than enough.
What’s the difference between e2-micro and e2-small?
: e2-micro is the “Always Free” instance. It has 2 virtual CPUs (shared) and 1 GB of memory. e2-small is the next step up and is not free. Always double-check that you have selected e2-micro.
What happens if I go over the free tier limits?
You will be billed for the overages at standard Google Cloud rates. The most common overage is network egress (1 GB limit). This is why you should monitor your billing, but for most small sites, it’s not an issue.
Can I host multiple WordPress sites on one e2-micro instance?
It is technically possible using multisite or by manually configuring NGINX, but it’s not recommended. The e2-micro instance is small, and performance will suffer. This guide is for hosting a single site.
I got stuck at step 2: ‘”In the top search bar, type “WordPress Bitnami” and select the “WordPress with NGINX and SSL Certified by Bitnami…” result. Bitnami pre-packages WordPress, which saves us a ton of setup time.’
No results found.
If I search for Bitnami in Marketplace, all I get is “Bitnami package for Osclass”
Googling the name reveals
“This product has been deprecated and will no longer be supported on Google Cloud Marketplace starting August 25, 2026”
Oh well.
There are multiple versions available you can use some other wordpress image